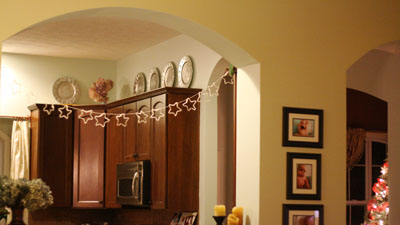
Anchoring Garland to the Top of Kitchen Cabinets
When I got the west Elm catalog in the mail before Thanksgiving, I was oogling over these cutsie little star garland thingies via David Stark. I thought it was the most precious little design, and I've just come to the apparent realization that I have this thing for stars, especially for Christmas. (See Aiden's room)
But when I finally got around to purchasing one {read: finally got my act together} they were all sold out. Lucky for me. I decided to make my own for free (things I already had lying pointlessly around in my disturbingly cluttered crap pile makeshift studio)
And you can too. What you will need:
Wire: a smaller gauge like the kind they have in the jewelry aisle of Michaels or HL.
Small wire cutter
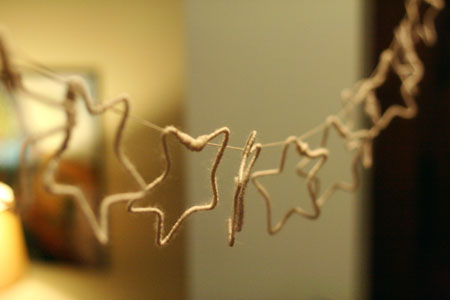
Yarn: A thick, fluffy kind. My initial inclination was to go with thin, but thick wraps better, and it gives a fun fuzzy sweater kind of look.
Tape
Hot glue gun
Scissors
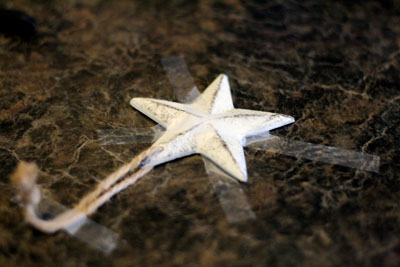
An ornament in the shape of a flat star (this will be your template, but you can easily print one off the internet and use it as well…that way its guaranteed to be proportional)
1. Take the ornament and tape it down. This will anchor it so you can wrap the wire around the edges. The step of wrapping the wire around the edges was impossible for me to snap a photo of, as I had the children (luckily) engaged in a Mickey Mouse Christmas movie, and I needed both hands if not three…but I think you get the picture.
2. Cut off extra wire (depending on how large your star is in proportion to your wire length leave a little excess so you can join the two open ends) and anchor that with a piece of tape.
3. Repeat until you have all your wire pieces. (plug in your glue gun)
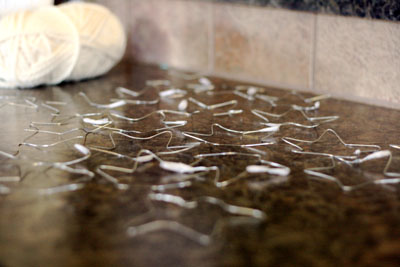
They don't have to be perfect. I think it makes for more of a delightful little homemade look, myself.
4. Take a wire piece, (there is a learning curve to this, if you haven't already noticed in perfecting your little wire stars…you get better as you go along) and a generous amount of yarn. With your glue gun, put a small amount of glue to anchor the yarn.
Note: you may want to remove your tape so there is less bulk under the tape. But I was lazy and left mine, because I didn't feel like fighting with the wire, and it left a nice place for me to start my glue without burning my hands)
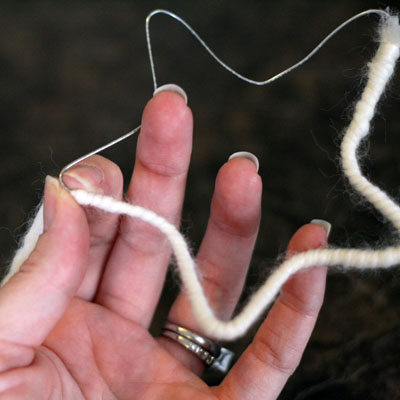
5. With the yarn anchored, start wrapping, very tightly, until you have completed your star
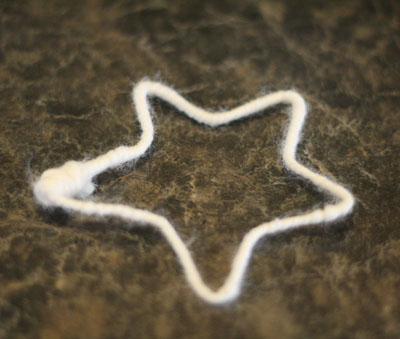
6. Repeat until you have coated all your desired stars. I was all double timing it, playing with the kids while I wrapped the stars. It kept my hands busy, but it was kind of like what I imagine knitting to feel like. This is a flexible project to leave and come back to if you're busy with three like me.
7. Take another piece of yarn (I used a thinner piece for hanging) and premeasure your desired hanging space. (I anchored mine at the top of two cabinets in my kitchen using a piece of tape) and put the string through each star, then come back through once with a single loop. (I hope this makes sense. It's just wrapping the yarn once around each star…this anchors them into place, but also makes for easy sliding once all stars are up and you can determine actual spacing between each one.)
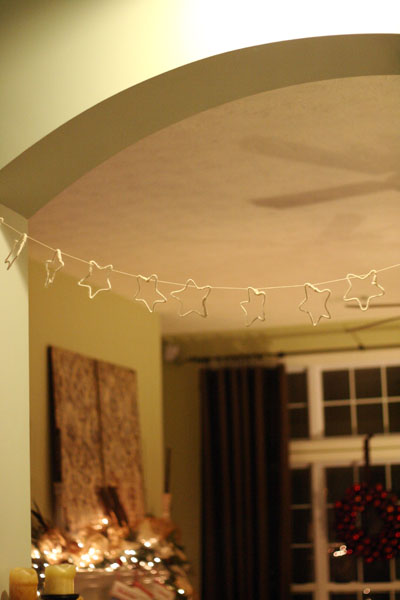
Viola. You have your star garland. I really like mine better anyway. The WE version didn't have enough stars for my desired hanging space, so I was going to have to purchase multiples.
I'm thinking I may let the kiddos do a little Christmas art, and adhere it to the stars with little clothespins. A new family trad.
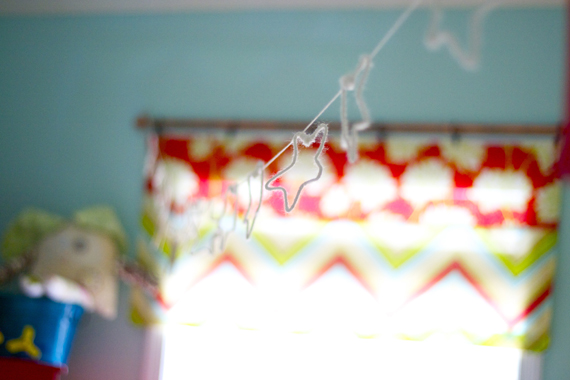
Aiden likes it so much, I may be putting it in his room to display art after the season has passed. Double duty.
• See our new kitchen, here. It's night + day, I tell you. ;}
• See the rest of our home redos, here.
Please let me know if you try this, or have any questions! Fun stuff!
Anchoring Garland to the Top of Kitchen Cabinets
Source: https://www.thehandmadehome.net/diy-star-garland/